JAVASCRIPT
Javascript is one of the most popular programming languages today. It can be used for making scripts, interactive web applications, and web APIs. It can even be used to make games. The largest benefit of the language is its ability to run in web browsers. This course will be highly tailored to that aspect of the language, however, we will first need to start with the basics.
Printing Values to the Console:
As we go through this course it will be useful to print out values to the console. We can do this with the built in console.log() function. Many of the exercises in this class will require that you log values to the console in order to confirm your results. This function can also be very useful when debugging your application.
Primitives:
Javascript is very different from HTML/CSS, it works completely differently, but don't worry! Everything you need to know will be here!
To start out, primitive types are:
Integers: 1,2,3,4,5,ect. Floating points: 2.3, 5.212, 3.14, etc. Strings: "Hello! I am a string!", "I'm also a string!" Booleans: true, false // just true or false! Null/Undefined: null, undefined // You'll see these a lot, basically if something doesn't exist and we try to access it, we'll get these back in return!
Numbers:
In the codehs sandbox, try writing some numbers. We can do any type of math with javascript that we could do with anything else! Here is some basic math:
4 + 20 // Addition41.3 - 300 // Subtraction10 / 3 // Division15 * 3 // Multiplication10 % 3 // Modulus (ONLY WORKS WITH WHOLE NUMBERS)You're probably very familiar with all of these basic math operators, but you may not have seen modulus yet. Modulus is just a remainder, so in integer division, 10 divided by 3 gives us 3 remainder 1. When we use modulus, 10 % 3 = 1. 10 % 2 doesn't have any remainder, so we get: 10 % 2 = 0.
As a quick note, all of these operators still follow the order of operations*.
Strings:
x"Hello World"'Hello World'//You can't do "Hello'// Quotes must match!// If you wanted to use an apostrophe, use double quotes, or you want to use double quotes in a string:"I don't ever want to stop coding"'He said "I like turtles" a lot'//concatenation:'Hello ' + 'World'Writing out math and strings is great and all, but that's not what makes code so powerful. We need a way to save those numbers, letters, booleans, etc. That's where variables come in.
Variables
In programming, it's commonplace to create 'references' to these values in memory. This is the concept of 'instantiating a variable' (const, let) and 'assigning a value to a variable' (=). Whenever a value in memory no longer has a reference to it, the JS garbage collector comes along to completely remove it from memory.
const vs. let
Two keywords allow us to create a variable: const and let.
If we create a variable with const, the variable cannot be reassigned with a new value. However, if we create a variable with let, the variable can be mutated(changed) and/or reassigned.
xxxxxxxxxxconst name;let favoriteSong;NOTE: You may have seen JS variables created with the keyword
var. The keywordvaris used in pre-ES6 JavaScript to create a variable. Although there is a key difference, you can think ofvaras simply being an alternative forletfor the time being.
Assignment Operator: =
The assignment operator (=) is used to link variables to the values they reference. The assignment operator works right to left, for example:
xxxxxxxxxxlet age = 29;In this example, we are creating a value (29) on the right and a variable (age)on the left. The assignment operator takes the value on the right and assigns it to the variable on the left.
The typeof Operator
You can check/get the type of data for any primitive by using the typeof operator like so:
xxxxxxxxxxtypeof "Motorbike";typeof 550;typeof false;The typeof operator returns the data type in a string (i.e. "string", "number", "boolean")
TIP: This can be handy when trying to debug your code. You can
log()thetypeofof some variable to make sure that the data type it references is what you expect.
Dynamic Typing
As a language, JavaScript is dynamically typed (or loosely typed) - we don't have to explicitly declare what type of data will be stored in a variable, and we can replace data of one type with any other type of data.
Changing from string to number is completely fine in javascript! This can be extremely helpful, but it can also be very difficult if you're not paying attention (e.g. it would get really weird if you were calculating someone's bill on your site, and you tried to add 15 + 'Sweater').
Type Conversions
Strings
Both booleans and numbers can be converted to a string using the String() function:
xxxxxxxxxx let boolVal = true; let boolStr = String(boolVal); // boolStr now stores the value "true" let numVal = 123; let numStr = String(numVal); // boolStr now stores the value "123"Additionally, variables of type boolean and number also have a method called `toString():
xxxxxxxxxx let boolVal = true; let boolStr = boolVal.toString(); // boolStr now stores the value "true" let numVal = 123; let numStr = numVal.toString(); // boolStr now stores the value "123"Booleans
The function Boolean can be used to convert values into the type boolean:
xxxxxxxxxx Boolean(""); // evaluates to false Boolean("true"); // evaluates to true Boolean("false"); // evaluates to true Boolean(0); // evaluates to false Boolean(1); // evaluates to trueNumbers
The function Number can be used to convert values into the type number:
xxxxxxxxxx Number("123"); // evaluates to the number 123 Number(""); // evaluates to the number 0 Number("0"); // evaluates to the number 0 Number("blob"); // evaluates to the number NaN Number(false); // evaluates to the number 0 Number(true); // evaluates to the number 1NaN
In the previous section we saw that Number("blob") evaluates to NaN. This stands for Not a Number.
isNaN
The tricky thing about NaN is that typeof NaN will evaluate to number which is weird but I guess thats javascript for you 🤷♂️. On top of that NaN === NaN evaluates to false. So how are you supposed to know if something is NaN? The answer is a function by the name isNaN. See the example below:
xxxxxxxxxx let a = "Carl's Jr"; let b = Number(a); let c = isNaN(b); // c will now be initialized to the value falseThis function can be useful for determining whether or not a user has provided a number
User Input:
There are a number of functions we'll be using throughout the course, and most of those will be defined by us. There are a couple of functions that we'll want to know about before we start using a lot of javascript.
alert():
Arguably one of the most annoying functions, alert is a really helpful function because it quite literally alerts the user and won't let them do anything until they've acknowledged what the alert is:
xxxxxxxxxx let alertMessage = 'HEY USER! LOOK AT ME!'; alert(alertMessage);This is often used for forgotten passwords or unsaved data, though it's not unheard of for sites to use alert for poor reasons.
prompt()
Prompt lets us very blatantly ask questions of our users. Just like alert, we can pass a string into our prompt, but this also comes with a text box for a user response:
xxxxxxxxxx let nameQuestion = "What is your name?"; prompt(nameQuestion);You can then enter your name. However, did you notice that nothing happened with your name? Let's try saving that data:
xxxxxxxxxx let nameQuestion = "What is your name?"; let userName = prompt(nameQuestion); // get both alerts and console.logs! alert('Hi ' + userName); console.log('Hello! ' + userName);Boolean logic:
Boolean logic is how we can do what is called "control flow". We'll get to controlling the flow of our programs work a little later, but first, we need to know how to properly show off our boolean values! For now we'll start with just with boolean values with true and false:
AND:
For something to work with AND, both sides around the && need to be true:
xxxxxxxxxx true && true // evaluates to true - both are true, so this resolves to being true true && false // evaluates to false - only one is true, so we ultimately get false false && true // evaluates to false - only one is true, so we ultimately get false false && false // evaluates to false - both are false! So naturally, false.OR:
xxxxxxxxxxFor something to work with OR, we just need one of the sides to be true around the `||` operator!
xxxxxxxxxx true || true // evaluates to true - both are true, so this is true! true || false // evaluates to true - one side is true, so we still get true false || true // evaluates to true - one side is true, so we still get true, even though the first was false false || false // evaluates to false - both are false! So, we ultimately get false here.The above are the basis of how we control the flow of our programs. This may not make sense now because well, true is true, that doesn't really tell us anything. Let's start looking at conditions:
Conditions:
When checking conditions, we can use basic greater than, less than, equal to, or not equal to in order to check what's going on with our program. These may not make the most sense at the moment (particuarly the checking for equality, but it'll make sense the more you use them!):
Less than / greater than:
xxxxxxxxxx1 < 5 is true because 1 is less than 55 < 2 is false because 5 is more than 22 > 5 is also false, because again, 5 is more than 2.
Equals / Not Equals:
Unlike less than and greater than, we need to do something different with checking for equality. This is because when we use 1 equals sign, in javascript that's the 'assignment' operator which we saw above in the variables section. To check for equality, we need to use ==. Likewise, to check for things not being equal, we need to use !=:
xxxxxxxxxx1 == 1 is true because one does equal one.1 == 5 is false because 5 and 1 are completely differet numbers.1 != 5 is true because 1 is not equal to 5!1 != 1 is false because 1 is equal to 1 (And by using the != operator, we're trying to see if they're not equal)
You can also check strings for equality!
xxxxxxxxxx"One String" == "Other String" is false because the strings don't say the same thing!"One String" != "Other string" is true because the strings don't equal each other!"Strings?" != "Strings?" is false because they are the same string, and we're checking for inequality!Hopefully those make a little bit of sense, but what's great is that we don't have to use 'literals' (that is, non-variables) to check for some sort of boolean condition:
xxxxxxxxxxlet oneIsLessThanFive = 1 < 5;console.log("it is " + oneIsLessThanFive + " that one is less than 5");let oneIsGreaterThanFive = 1 > 5;console.log("it is " +oneIsGreaterThanFive + " that one is greater than 5");let oneEqualsOne = 1 == 1;console.log("it is " + oneEqualsOne + " that one equals one!");let fiveEqualsOne = 5 == 1;console.log("it is " + fiveEqualsOne + " that five equals one!");let oneIsNotFive = 1 != 5;console.log("it is " + oneIsNotFive + " that one is not five");let stringEquality = "Strings?" == "Strings?";console.log("it is " + stringEquality + " that the two strings `Strings?` and `Strings?` are equal");let stringNotEqual = "One String" == "Other String";console.log("it is " + stringNotEqual + " that 'One string' is equal to 'Other string'");let stringInequality = "One String" != "Other String";console.log("it is " + stringInequality + " that 'One String' does not equal 'other'");let sameStringInequality = "Strings?" != "Strings?";console.log("it is " + sameStringInequality + " that 'Strings?' and 'Strings?' are not equal");We can save the truthiness of those operators in variables like we just did, but what makes this REALLY powerful is that we can check the truthfulness of variables themselves! We'll take the exact same code as above, but now everything will be a variable!
xxxxxxxxxxlet one = 1;let five = 5;let oneIsLessThanFive = one < five;console.log("it is " + oneIsLessThanFive + " that one is less than five");let oneIsGreaterThanFive = one > five;console.log("it is " +oneIsGreaterThanFive + " that one is greater than five");let oneEqualsOne = one == one;console.log("it is " + oneEqualsOne + " that one equals one!");let fiveEqualsOne = five == one;console.log("it is " + fiveEqualsOne + "that five equals one!");let oneIsNotFive = one != five;console.log("it is " + oneIsNotFive + " that one is not five");let stringQuestion = "Strings?";let oneString = "One String";let otherString = "Other String";let stringEquality = stringQuestion == stringQuestion;console.log("it is " + stringEquality + " that the two strings `Strings?` and `Strings?` are equal");let stringNotEqual = oneString == otherString;console.log("it is " + stringNotEqual + " that 'One string' is equal to 'Other string'");let stringInequality = oneString != otherString;console.log("it is " + stringInequality + " that 'One String' does not equal 'other'");let sameStringInequality = stringQuestion != stringQuestion;console.log("it is " + sameStringInequality + " that 'Strings?' and 'Strings?' are not equal");By doing what we just did above, we can now create really powerful programs!
It is also possible to string the boolean logic together:
xxxxxxxxxxlet one = 1;let five = 5;let oneIsLessThanFive = one < five;console.log("it is " + oneIsLessThanFive + " that one is less than 5");let oneIsGreaterThanFive = one > five;console.log("it is " +oneIsGreaterThanFive + " that one is greater than 5");let eitherOR = oneIsLessThanFive || oneIsGreaterThanFive;let bothAnd = oneIsLessThanFive && oneIsGreaterThanFive;console.log("only one can be true, is it the 'eitherOr' or the 'bothAnd'? eitherOR: " + eitherOR + " bothAnd:" + bothAnd);// The above code for either or is the same as writing:eitherOR = one < five || one > five;bothAnd = one < five && one > five;// either either or is true or both and is true, to say that we would write:let ultimateOutcome = eitherOR || bothAnd;// the same way to write the above is:ultimateOutcome = (one < five || one > five) || (one < five && one > five);console.log('The ULTIMATE outcome: ' + ultimateOutcome);Don't get too bogged down into trying to follow the logic. Just so long as you understand the basic's that's good enough (entire careers are spent in logic! We only need the basics).
Triple Equals
The === operator is very similar to the == operator. The one key difference is that === checks the type of each operand.
For example:
xxxxxxxxxx12 == "12" // evaluates to true12 === "12" // evaluates to falseThis distinction exists because of a little thing in Javascript called 'type coercion' but we won't get into that. In general, stick to using === in your programs to avoid bugs.
Ifs Elses:
These follow the exact same logic as how we speak:
If I eat icecream then I will be happy! ELSE (that is, if I don't eat ice cream) I will be very sad.
What's different is that in the code, we need to have our sentence follow a special syntax:
xxxxxxxxxx if(some truthy statement) { // MAKE SURE TO WRAP THIS IN CURLY BRACES LIKE SO: console.log('someSpecialOutcome is happening because our truthy statement was true'); } else { console.log('some other outcome is happening if the trythy statement is false'); };Let's code this out:
xxxxxxxxxx let snackIWillEat = 'iceCream'; if(snackIWillEat == 'iceCream'){ alert('I AM VERY HAPPY!'); } else { console.log('NOW I AM SAD') };This code alerted us that I was happy because I ate ice cream! What if I didn't, though? Let's try it again:
xxxxxxxxxx let snackIWillEat = 'broccoli'; if(snackIWillEat == 'iceCream'){ alert('I AM VERY HAPPY!'); } else { console.log("Well now I'm sad"); };Now we see that in the console, I printed that I was sad. That's because 'broccoli' just isn't ice cream.
It's fun to know whether or not someone will be sad when they don't eat ice cream, BUT why are conditionals useful? What if you needed somebody to log into a website? You would need a conditional to verify that they were who they said they were!
xxxxxxxxxx let userName = prompt("Who are you?"); if(userName == "Spice Girls") { alert("SPICE UP YOUR LIFE"); } else { alert("Get out of here you unspicy person!"); };Now, let's take a second and talk about using multiple ifs! You can "nest" if/else statments:
xxxxxxxxxx let userName = prompt("Who are you?"); if(userName == "Spice Girls") { alert("SPICE UP YOUR LIFE"); } else if (userName == "Beastie Boys"){ alert("FIGHT FOR YOUR RIGHT TO PARTY!!"); } else { alert("Get out of here you unspicy person!"); };You can nest as many if elses as you want! If this looks super weird, don't worry too much on syntax now. We'll be doing this a lot, and it will eventually sink in!
For loops:
For loops are the exact same as while loops, but they're a bit more compact! They look like:
xxxxxxxxxxfor( initializer ; condition to check ; something to do after the code runs ){ // looped code goes here}What that looks like is:
xxxxxxxxxxfor (var i = 0; i < 10; i = i + 1){ console.log("I like to repeat myself. " + i + " times");}You may be wondering what the point of a for loop is, since we can do everything in a while loop just as easily. A lot of people use for loops so that they can easily iterate over arrays (which we're talking about next)!
Arrays
Up to now, all of the variables that we've worked with have stored only one value. That's really helpful (and you'll use it a lot), but it's also possible to store a bunch of values in a single variable! These are what we call 'arrays'.
Arrays are typically used to store a list of things that are similar, like names, dates, etc.
Think of an array as a box with some values in it!
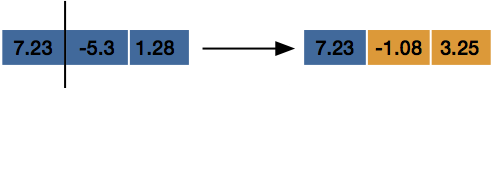
xxxxxxxxxxvar array = [7.23, -5.3, 1.28]Now we have an array called array (clever, right?) which we can think of like a box with those values inside:

To access what's inside of an array, we need to use a special notation like:
xxxxxxxxxxarrayName[indexOfPosition]All array elements have an index that starts counting at 0. array above has 3 indexes, numbered 0, 1, and 2. It may not make that much sense now, but that is the typical convention for how to write arrays in many langauges.
To access elements in our var array, we then could use the notation:
xxxxxxxxxxconsole.log('The first element of our array is: ' + array[0])console.log('The second element of our array is: ' + array[1])console.log('The third element of our array is: ' + array[2])And because our arrays are vars, we can change what's inside! Let's start over with our code:
xxxxxxxxxxvar array = [7.23, -5.3, 1.28]console.log('The first element of our array is: ' + array[0])console.log('The second element of our array is: ' + array[1])console.log('The third element of our array is: ' + array[2])array[1] = -1.08array[2] = 3.25console.log('The first element of our array is: ' + array[0])console.log('The second element of our array is: ' + array[1])console.log('The third element of our array is: ' + array[2])
You can think of what's happening in array as:
Now, what if, instead of having only 3 elements in our array, we had 100? Instead of writing a console log for all 100 elements, we can use loops! Remember the .length we could use for strings? We can also use that for arrays! This is really good for knowing how many times we want to loop! Check it out:
xxxxxxxxxxvar array = [7.23, -5.3, 1.28]for(var i = 0; i < array.length; i++) { console.log('The element at index ' + i + ' is ' + array[i])}array[1] = -1.08array[2] = 3.25for(var i = 0; i < array.length; i++) { console.log('The element at index ' + i + ' is ' + array[i])}Objects:
An object is another way to store data. Unlike arrays, however, objects aren't really lists. Objects are ways to store data of different kinds in one spot. Objects have what are called key : value pairs. You can access the value inside of the object by calling object.key.
Think of an object as a variable that has a bunch of other, named variables inside of it. An object looks like:
xxxxxxxxxxvar myObject = { variableString: 'Something goes here', variableString2: 'Something else goes here', variableNumber: 14, variableNumber2: 3.14}To access the values inside of myObject, you need to use the key. You can do that by typing something like myObject.variableString and that would return the sentence 'Something goes here'. Let's try printing the elements of our object:
xxxxxxxxxxvar myObject = { variableString: 'Something goes here', variableString2: 'Something else goes here', variableNumber: 14, variableNumber2: 3.14}console.log('The insides of myObject are: ')console.log(myObject.variableString)console.log(myObject.variableString2)console.log(myObject.variableNumber)console.log(myObject.variableNumber2)
Any object is declared just like any other variable, but instead of directly assigning a value to it, you use curly braces { } and then start declaring your keys value pairs! One thing to note is that your keys don't have to be named boring names like variableNumber or variableString. Keys can have any name. You can also :
xxxxxxxxxxvar myDetails = { name: 'My Name', birthday: 'MyBirthday', favoriteFood: 'Pizza', moneys: 1000000000, socialSecurityNumber: 123456789}
Let's say for some reason, you decided that your favorite food wasn't pizza, and instead you wanted to change it to broccoli for some reason. You could change that by just reassigning it like you do with a variable!
xxxxxxxxxxvar myDetails = { name: 'My Name', birthday: 'MyBirthday', favoriteFood: 'Pizza', moneys: 1000000000, socialSecurityNumber: 123456789}// for some reason you don't like pizza anymore:myDetails.favoriteFood = 'broccoli'console.log('My new details are: ')console.log(myDetails.name)console.log(myDetails.birthday)console.log(myDetails.favoriteFood)console.log(myDetails.moneys)console.log(myDetails.socialSecurityNumber)Mixing and Matching!
The more you learn to code, the more you'll realize that you can mix and match everything we've done so far:
Objects with Arrays:
Just like our objects can store any data we want, we can also have them store arrays too! Suppose we took what we did above (reminder that we had changed our favorite food to broccoli):
xxxxxxxxxxvar myDetails = { name: 'My Name', birthday: 'MyBirthday', favoriteFood: 'broccoli', moneys: 1000000000, socialSecurityNumber: 123456789}Instead of one favorite food, we wanted to have a whole list (why limit ourselves to just one!):
xxxxxxxxxxvar myDetails = { name: 'My Name', birthday: 'MyBirthday', favoriteFood: ['pizza', 'broccoli', 'ice cream', 'tacos', 'cabbage', 'brussels sprouts'], moneys: 1000000000, socialSecurityNumber: 123456789}
Now we can have a whole list of foods that we love! To access our foods, we just need to use the same notation we used with objects AND mix that with the notation we used for arrays:
xxxxxxxxxxvar myDetails = { name: 'My Name', birthday: 'MyBirthday', favoriteFood: ['pizza', 'broccoli', 'ice cream', 'tacos', 'cabbage', 'brussels sprouts'], moneys: 1000000000, socialSecurityNumber: 123456789}console.log('My first favorite food is: ', myDetails.favoriteFood[0])console.log('My second most favorite food is: ', myDetails.favoriteFood[1])console.log('My third most favorite food is: ', myDetails.favoriteFood[2])console.log('My fourth most favorite food is: ', myDetails.favoriteFood[3])console.log('My fifth most favorite food is: ', myDetails.favoriteFood[4])console.log('My sixth most favorite food is: ', myDetails.favoriteFood[5])
That all looks fine and dandy, but wouldn't it be easier to use a loop? Maybe a for loop?
xxxxxxxxxxvar myDetails = { name: 'My Name', birthday: 'MyBirthday', favoriteFood: ['pizza', 'broccoli', 'ice cream', 'tacos', 'cabbage', 'brussels sprouts'], moneys: 1000000000, socialSecurityNumber: 123456789}console.log('My favorite foods ranked in order are: ' )for(var i = 0; i < 6; i++ ){ console.log(i + '. ' + myDetails.favoriteFood[i]) //here we're using i to count from 0->5}
Remember how arrays all have the .length property? We can use that in our for loop here:
xxxxxxxxxxvar myDetails = { name: 'My Name', birthday: 'MyBirthday', favoriteFood: ['pizza', 'broccoli', 'ice cream', 'tacos', 'cabbage', 'brussels sprouts'], moneys: 1000000000, socialSecurityNumber: 123456789}console.log('My favorite foods ranked in order are: ' )for(var i = 0; i < myDetails.favoriteFood.length; i++ ){ // use the .length! console.log(i + '. ' + myDetails.favoriteFood[i])}Arrays of Objects:
To create an array of objects, instead of using single 'primitive' types, we can use objects instead. Let's assume we're running a pizza restaurant and we need to send a list of pizza orders to our kitchen so they fire those pizzas up!
xxxxxxxxxxvar pizzaList = [ // open the array with the square brackets { sizeInches: 12, sauce: 'Tomato', style: 'Meat Lovers', }, { sizeInches: 8, sauce: 'Alfredo', style: 'Cheese', }, { sizeInches: 12, sauce: 'Tomato', style: 'Vegetarian', } // There's no comma at the end because it's the last element!]
We'll need a way to print those pizzas out. We've seen objects with arrays in them, but how do we access they keys of objects inside of an array? The way we do that is like:
xxxxxxxxxxlistName[indexPosition].key
It may look weird now, but you'll get used to it. Let's try by printing our pizza list in a loop:
xxxxxxxxxxvar pizzaList = [ { sizeInches: 12, sauce: 'Tomato', style: 'Meat Lovers', }, { sizeInches: 8, sauce: 'Alfredo', style: 'Cheese', }, { sizeInches: 12, sauce: 'Tomato', style: 'Veggie Lovers', }]console.log('THE PIZZAS WE NEED TO MAKE ARE: ')for (var i = 0; i < pizzaList.length; i++){ console.log('Pizza ' + i) console.log('Size: ' + pizzaList[i].sizeInches) // listName[index].key console.log('Sauce: ' + pizzaList[i].sauce) console.log('Style: ' + pizzaList[i].style) console.log('\n') // "\n" adds a new line in the console so we can separate the pizzas!}Arrays of Objects WITH Arrays in them:
Here we're going to tackle two new ideas! First, what if we had a list of pizzas, but what if each of our pizzas had a list of ingredients? Let's see what that looks like first (we'll change our meat lovers to have a whole slew of meats, our vegetarian will have just veggies, and our cheese will have… well, cheese):
xxxxxxxxxxvar pizzaList = [ { sizeInches: 12, sauce: 'Tomato', ingredients: ['Pepperoni', 'Sausage', 'Bacon', 'Chicken', 'Anchovies', 'Bratwurst'], }, { sizeInches: 8, sauce: 'Alfredo', ingredients: ['Cheese'], }, { sizeInches: 12, sauce: 'Tomato', ingredients: ['Mushrooms', 'Spinach', 'Broccoli', 'Sweet Potato', 'Asparagus'], }]
Those pizzas look delicious, but how are we going to print them out? We know we can print an array pretty easily with a for loop. We could try to hard code everything out like we've done before:
xxxxxxxxxxvar pizzaList = [ { sizeInches: 12, sauce: 'Tomato', style: 'Meat Lovers', ingredients: ['Pepperoni', 'Sausage', 'Bacon', 'Chicken', 'Anchovies', 'Bratwurst'], }, { sizeInches: 8, sauce: 'Alfredo', style: 'Cheese', ingredients: ['Cheese'], }, { sizeInches: 12, sauce: 'Tomato', style: 'Veggie Lovers', ingredients: ['Mushrooms', 'Spinach', 'Broccoli', 'Sweet Potato', 'Asparagus'], }]console.log('THE PIZZAS WE NEED TO MAKE ARE: ')for (var i = 0; i < pizzaList.length; i++){ console.log('Pizza ' + i) console.log('Size: ' + pizzaList[i].sizeInches) // listName[index].key console.log('Sauce: ' + pizzaList[i].sauce) console.log('Style: ' + pizzaList[i].style) console.log('Ingredients: ') console.log(pizzaList[i].ingredients[0]) console.log(pizzaList[i].ingredients[1]) console.log(pizzaList[i].ingredients[2]) console.log(pizzaList[i].ingredients[3]) console.log(pizzaList[i].ingredients[4]) console.log(pizzaList[i].ingredients[5]) console.log('\n') // "\n" adds a new line in the console so we can separate the pizzas!}
What'd you notice? There were a lot of undefineds printed. That's because each of the objects has an ingredients list that is a different length! The Meat Lovers ingredients array is 6 elements long, the Cheese is just 1, and the Veggie Lovers is 5.
Since arrays come with that fancy .length method, let's use it! There's nothing that says we can't put a loop inside of a loop! Let's give it a go!
xxxxxxxxxxvar pizzaList = [ { sizeInches: 12, sauce: 'Tomato', style: 'Meat Lovers', ingredients: ['Pepperoni', 'Sausage', 'Bacon', 'Chicken', 'Anchovies', 'Bratwurst'], }, { sizeInches: 8, sauce: 'Alfredo', style: 'Cheese', ingredients: ['Cheese'], }, { sizeInches: 12, sauce: 'Tomato', style: 'Veggie Lovers', ingredients: ['Mushrooms', 'Spinach', 'Broccoli', 'Sweet Potato', 'Asparagus'], }]console.log('THE PIZZAS WE NEED TO MAKE ARE: ')for (var i = 0; i < pizzaList.length; i++){ console.log('Pizza ' + i) console.log('Size: ' + pizzaList[i].sizeInches) // listName[index].key console.log('Sauce: ' + pizzaList[i].sauce) console.log('Style: ' + pizzaList[i].style) console.log('Ingredients: ') // adding INSIDE loop here: Make sure to use a different variable for counting and not `i` for (var j = 0; j < pizzaList[i].ingredients.length; j++){ console.log(pizzaList[i].ingredients[j]) } console.log('\n') // "\n" adds a new line in the console so we can separate the pizzas!}
There's so much going on! Let's take a moment and look just at that internal for loop:
xxxxxxxxxx // adding INSIDE loop here: Make sure to use a different variable for counting and not `i` for (var j = 0; j < pizzaList[i].ingredients.length; j++){ console.log(pizzaList[i].ingredients[j]) }
Here we are declaring a new loop, but this time we're usting j instead of i. That's because we've already declared an i above in the first for loop! We need that i to access the pizzaList object by using pizzaList[i].
When we're declaring our stopping codition in the for loop, see how we're accessing the length of ingredients by pizzaList[i].ingredients.length? This works just like pizzaList.length, but now it's checking the length of the ingredients inside of of pizzaList[i].
Finally, to access each individual ingredient, notice how we're using i to denote which pizza we're looking at, and j to denote which ingredient we're looking at!
Loops inside of loops are called nested loops. They're very powerful, but they definitely take a minute to understand, so if it doesn't make too much sense right, no worries! We'll come back to these later. For now, take a look at this code (which will print out every single i and j along with the pizzas and ingredients)
xxxxxxxxxxvar pizzaList = [ { sizeInches: 12, sauce: 'Tomato', style: 'Meat Lovers', ingredients: ['Pepperoni', 'Sausage', 'Bacon', 'Chicken', 'Anchovies', 'Bratwurst'], }, { sizeInches: 8, sauce: 'Alfredo', style: 'Cheese', ingredients: ['Cheese'], }, { sizeInches: 12, sauce: 'Tomato', style: 'Veggie Lovers', ingredients: ['Mushrooms', 'Spinach', 'Broccoli', 'Sweet Potato', 'Asparagus'], }]console.log('THE PIZZAS WE NEED TO MAKE ARE: ')for (var i = 0; i < pizzaList.length; i++){ console.log('Pizza ' + i) console.log('Size: ' + pizzaList[i].sizeInches) // listName[index].key console.log('Sauce: ' + pizzaList[i].sauce) console.log('Style: ' + pizzaList[i].style) console.log('Ingredients: ') // adding INSIDE loop here: Make sure to use a different variable for counting and not `i` for (var j = 0; j < pizzaList[i].ingredients.length; j++){ console.log(pizzaList[i].ingredients[j] + ' : i = ' + i + ' j = ' + j ) } console.log('\n') // "\n" adds a new line in the console so we can separate the pizzas!}Functions:
Functions are the most powerful part of any language! We've been using functions this entire time already, but we just didn't realize it. console.log is a function provided by javascript that lets us print to the console!
What makes functions so powerful is that they let us split our code up into small, reusable modules! They also let us keep our code really clean! Once our projects start getting really big, it's easy to lose place of where you put a certain chunk of code!
There are many ways to write a function in javascript, but the way we're goin to write functions is like:
xxxxxxxxxxconst functionName = function() { // function body}Note: you first probably noticed that we said const. That's because if you make your function a var you might accidentally write over it (because you can reassign variables to a new value)!
We called our function functionName and then assigned it the the value of function(){ }. What we just did was create an empty function. By using the function() keyword, we're saying that whenver we call this later (like when we call console.log) we'll get to execute whatever code we put in the body! Let's give it a quick go:
xxxxxxxxxxconst pizzaQuestion = function() { console.log('Do you like pizza?'); console.log('OF COURSE YOU DO BECAUSE PIZZA IS AMAZING!')};pizzaQuestion() // this calls the function
Now, when you have a function declared, notice that none of those console logs show up in our console. That's because the code can only be executed when we invoke our function! That's done by calling our function like pizzaQuestion().
Note: You absolutely need to write the () after your function name to call it. Otherwise, your console will just tell you that what you entered was a function.
Parameters:
One thing that makes functions really useful is that they can take in parameters! A parameter is a special value that we "pass in" to our function:
xxxxxxxxxxconst functionName = function(parameter1, parameter2) { console.log('Parameter 1 is ', parameter1) console.log('Parameter 2 is ', parameter2)}// call it with the name:functionName('WHAT?', 'HUZZAH')By passing variables into our functions, we can work with the data we pass and do some pretty cool things!
xxxxxxxxxxconst doMath = function(number1, number2) { var newNumber = number1 + number2 console.log('The sum of ' + number1 + ' and ' + number2 + ' is ' + newNumber)}doMath(11, 22) // this calls the function by passing in numbers to doMath!You don't have to pass in literal numbers and strings to functions! You can also pass in variables!
xxxxxxxxxxconst doMath = function(number1, number2) { var newNumber = number1 + number2 console.log('The sum of ' + number1 + ' and ' + number2 + ' is ' + newNumber)}var eleven = 11var twentyTwo = 22doMath(eleven, twentyTwo) // this calls the function by passing in numbers to doMath!Return Values:
Functions would be great with just the ability to store code and take in parameters, but what makes functions so powerful is that they can also return values! Let's try one with no parameters, and go back to pizza. When you return a value from a function, you need to have a variable catch it!:
xxxxxxxxxxconst pizzaQuestion = function() { console.log('Do you like pizza?'); console.log('OF COURSE YOU DO BECAUSE PIZZA IS AMAZING!') return "You're getting a cheese pizza!"};var pizzaReturn = pizzaQuestion() // pizza question returned a string to the varconsole.log(pizzaReturn) // print what pizzaQuestion returned!
When pizzaQuestion returned the string "You're getting a cheese pizza", it stored that value in pizzaReturn.
To make our functions more dynamic, we can actually pass data into them with the paramaters, and then return some data based off of what we passed in! Let's go back to our doMath function:
xxxxxxxxxxconst doMath = function(number1, number2) { var newNumber = number1 + number2 console.log('The sum of ' + number1 + ' and ' + number2 + ' is ' + newNumber) return newNumber}var eleven = 11var twentyTwo = 22var mathReturn = doMath(eleven, twentyTwo) // return newNumber and stores it in mathReturnIn the above function, we not only passed data in, we also manipulated it to get a new value, and returned that data in a new variable! Passing data back and forth is exactly how incredibly responsive websites are built!